



















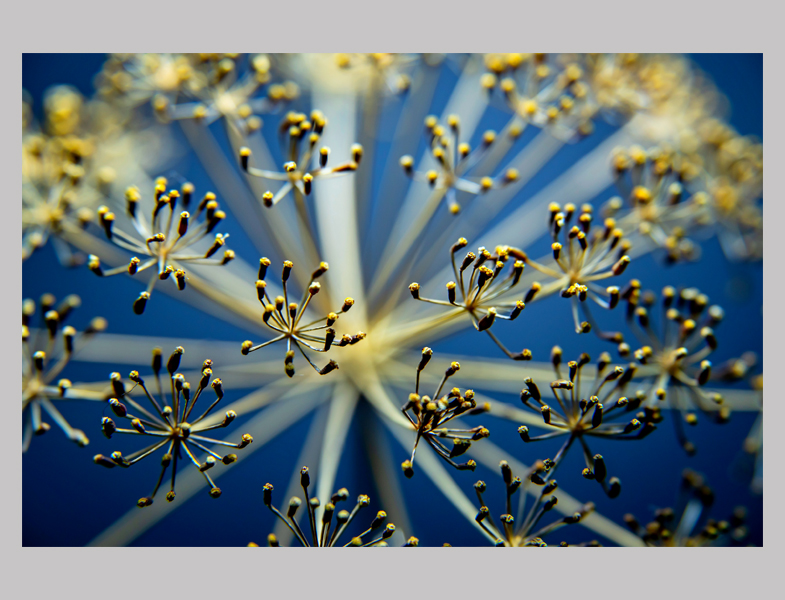
Macro photography is also known as close-up photography. Macro photography compared to other types of photography; It is quite difficult due to the equipment, lighting and other techniques used. But the results have always been surprising and impressive. It's a great way to show ordinary objects in a new light.













Text and Photos: Özgür SAYİTOĞLU
A macro photographer looks at the object he will shoot in a somewhat technical and scientific way. He first creates the composition and setup of the subject he will shoot in his mind and makes preparations accordingly.
Equipment generally needed to take macro photographs; macro lens, extension tubes or reverse adapter rings, tripod, external flash or constant illumination, various colored backgrounds.
I used extension tubes in my first macro experiments. A cheaper method. I started shooting at the closest ratio of 1:1 using the 12mm / 36mm extension ring with the 50mm prime lens. Sometimes I got closer by using a 12mm/20mm/36mm extension ring. However, in this case, the light decreases very much and it becomes difficult to provide effective lighting. As I gained experience in shooting, I started using macro lenses. Thus, I was able to reach clearer details. I would like to tell you about a few practical techniques for taking polished macro photos.
Background
Avoid blank backgrounds. Negative space is useful, but in a macro shot, empty space is a void that draws the eye away from the subject. What we don't want is for the person looking at the photo to focus on a large empty background mass that doesn't attract their attention. Always place a plain background behind the subject or find a way to fill the empty space.
Contrast Color
Look for contrasting tones to highlight what's naturally present and make your shots pop with color. Whether this is a printed background that you can place behind the subject to suggest a particular environment, a naturally occurring colorful foliage, or whether the background is revealed by different lighting, always pay attention to color interactions.
Move down and focus on small objects, challenging your eye aesthetics. Look from the opposite angle and create depth with lateral light. Try different angles and show the viewer different features of a standard object.
Studio Creation
Bring the subject into a studio environment for maximum light and exposure control. When you go outside, you may not be able to have full control over lighting and background due to wind movement or changing conditions. So if possible, bring the object indoors. This could even be your kitchen table. Maintaining a natural feel by keeping your lighting directional, avoiding indoor ambient light and applying water droplets to simulate rain texture, for example, is pretty simple indoors and produces really effective results.
Object Placement
Don't always fill the frame. Shoot from further back so your subject takes up slightly less space in the frame. Show your object partially. This will arouse curiosity in the audience. In fact, cutting the object right in the middle will draw attention to the object. In general, try to use a plain and dark background. Complex background is distracting and reduces interest in the photo.
Focus
Focus is everything: Try both shallow depth of field and deeper depth of field to find the balance between depth and distraction. Shoot at maximum aperture for extremely limited depth of field and create interesting styles with focus stacking for contrasting effect.
Macro photos are expected to have extensive bokeh, so front-to-back focus can be surprising. But the f/2 aperture on a true macro optic limits sharpness to just a few millimeters, allowing you to experiment with color and light. In macro shots, apertures between F8-F14 are generally used, which provides a deeper clear depth of field.
Photo Processing
The longest and perhaps most patience-requiring aspect of the photos you take is working on the photo for hours to get the right result. However, photography finds its true value when it is processed well. First, go to the extreme when processing. Push the limits, especially in the settings. See the differences and complete the edits according to what you want to offer.
Sometimes editing the same photo in more than one different way can create different dramatic images. Don't be afraid to crop the photo. You can make the object a stronger focal point by cutting it in the appropriate format.
Approaching Objects
Go to the closest focusing distance allowed by the lens you are using and try to capture the details. Show how some objects you see in your daily life look different up close. Focusing on the central point, especially in flowers, will create very interesting photographs.
Use Your Creativity
There isn't much to say at this point. It all depends on your inner world, your observation skills and creativity. Carefully examine the objects in your daily life and think about how you can create effective photographs from them. Check out the sample studies.